


-
1
Create document
.Go to . You will open a window (image below) where you can define the settings of the document.
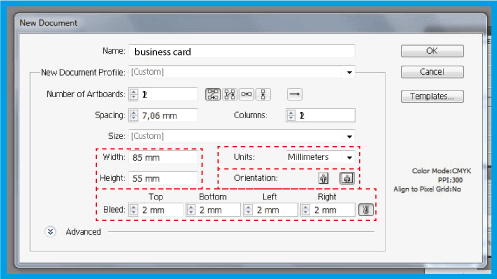
.In choose the unit you prefer, in this case we used .
.In define the width of your document and, in the the height.
.In if you want your document to appear vertically or horizontally.
.In the option, place 2mm (it is advisable to place this dimension for any document you build).
-
2
BLEED
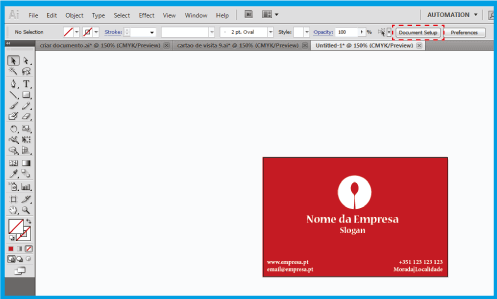
.In the top menu click the button.
.N the option, place 2mm in all fields.
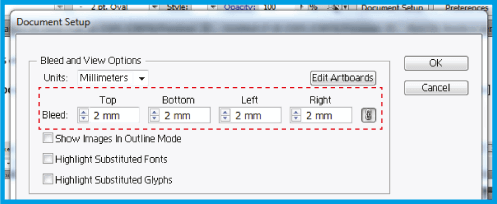
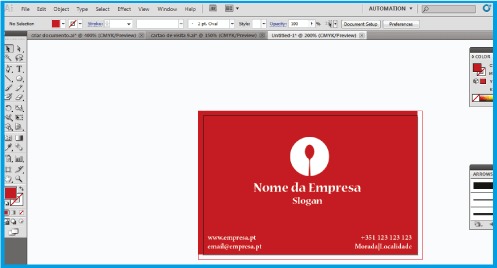
.Select . Your document will show an external line.
.Make your background elements (images, color, lines...) reach the edges. Do not put text outside or too close to the black outline, thus ensuring that it will not be cut
-
3
SAVE DOCUMENT
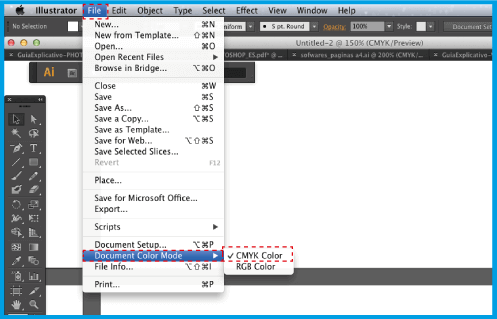
.Before saving the document, make sure you put it in so there will be no changes in color. Go to .
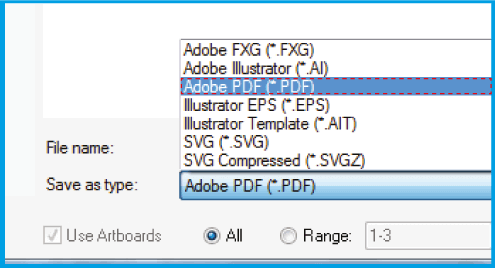
.Save the document in and select the format ..
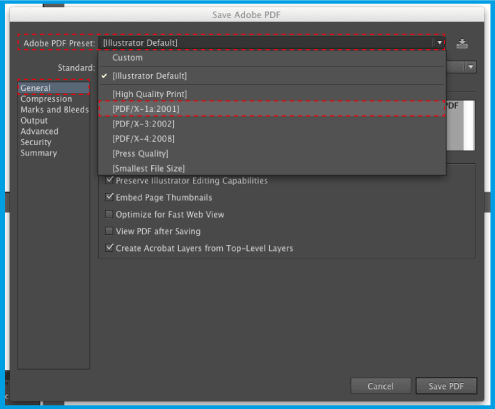
.In the window that opens, in select This option ensures that the PDF will not change.
.On the left side click and then under .
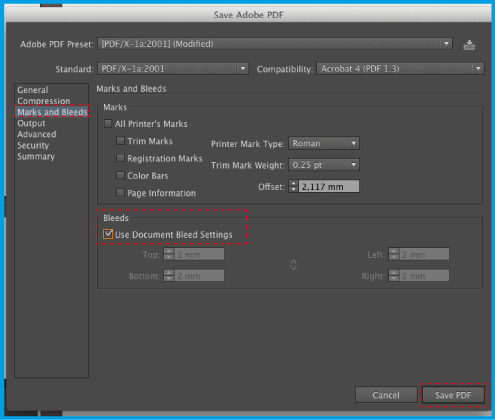
.Save the .
Software guides - ADOBE® ILLUSTRATOR